GitHub+Nginx+Jekyll自动更新部署网站
配置WebHook
在仓库上安装webhook,进入仓库的设置页面,左侧单击Webhooks
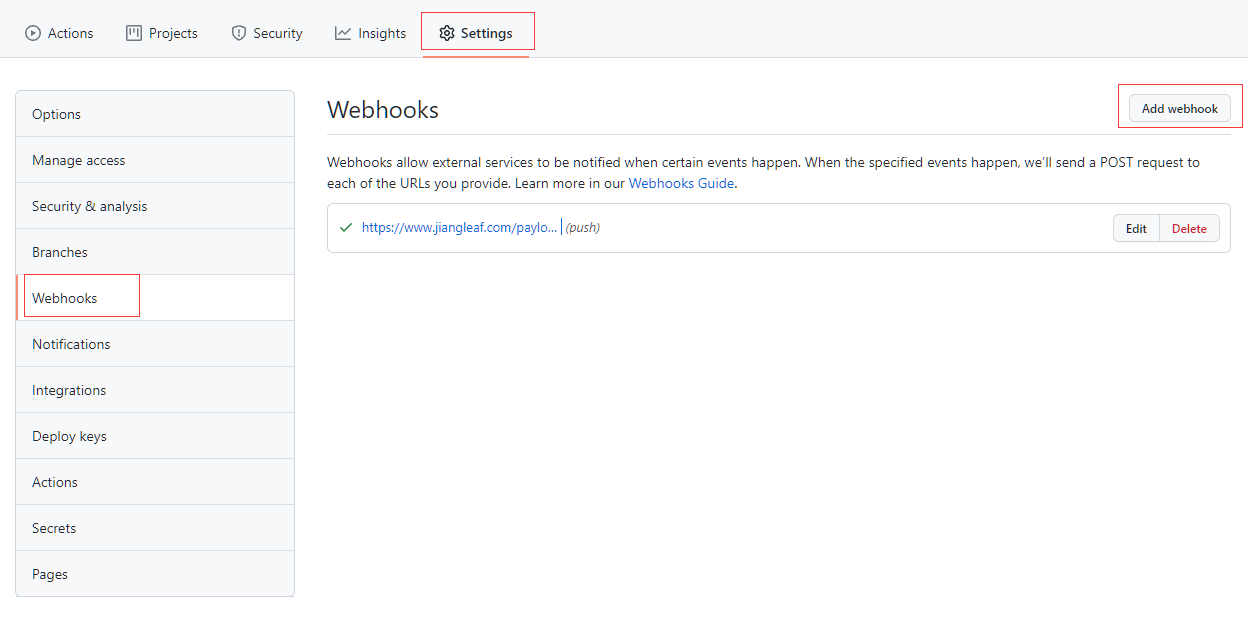
然后单击 Add webhook
-
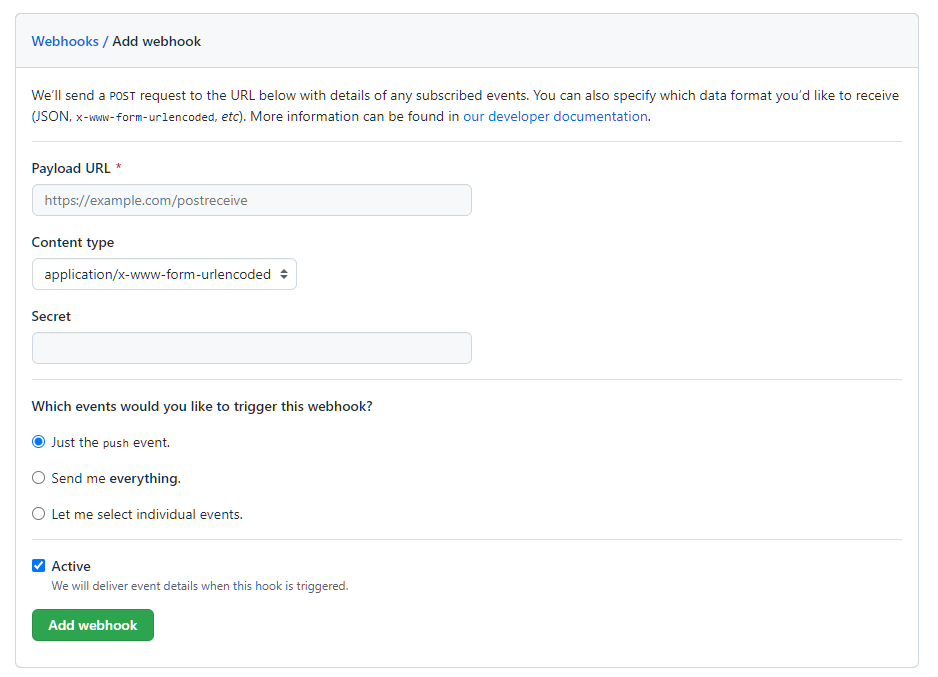
Payload URL
是接收 webhook
POST请求的服务器 URL地址可以根据网站的域名设置请求地址。例如:
https://www.jiangleaf.com/payload -
Content type
Web 挂钩可通过不同的内容类型传递:
application/json直接传递 JSON 数据,作为POST请求的正文。application/x-www-form-urlencoded发送 JSON 数据,作为名为payload的表单参数。
选择
application/json。 -
Secret
设置 webhook 密钥可以确保
POST请求是发送到来自 GitHub 的。 在设置密钥时,会在 webhookPOST请求中收到X-Hub-Signature和X-Hub-Signature-256标头。 有关如何使用密钥和签名标头来保护 webhook的更多信息,请参阅“保护 webhook”。 -
SSL验证
如果您的“Payload URL”是一个安全站点 (HTTPS),您可以选择配置 SSL 验证设置。 如果您的“Payload URL”不安全站点 (HTTP),GitHub 不会显示此选项。 默认情况下,GitHub 在传递 Payload URL 时验证网站的 SSL 证书。 SSL 验证有助于确保将 Payload URL 安全地传递到目标服务器。 可以选择禁用 SSL。
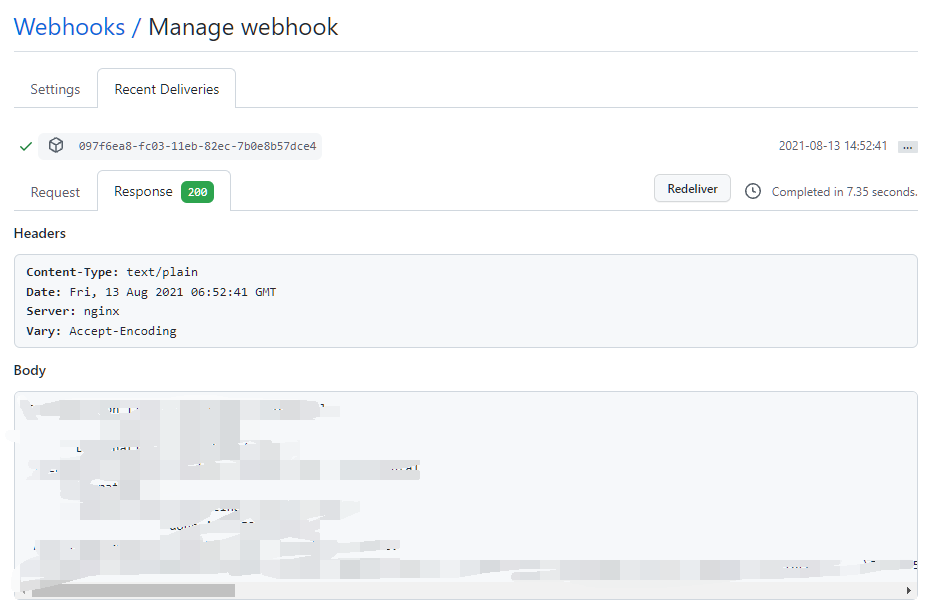
测试WebHook
单点Edit,进入Manage webhook,webhook日志最多保存30天
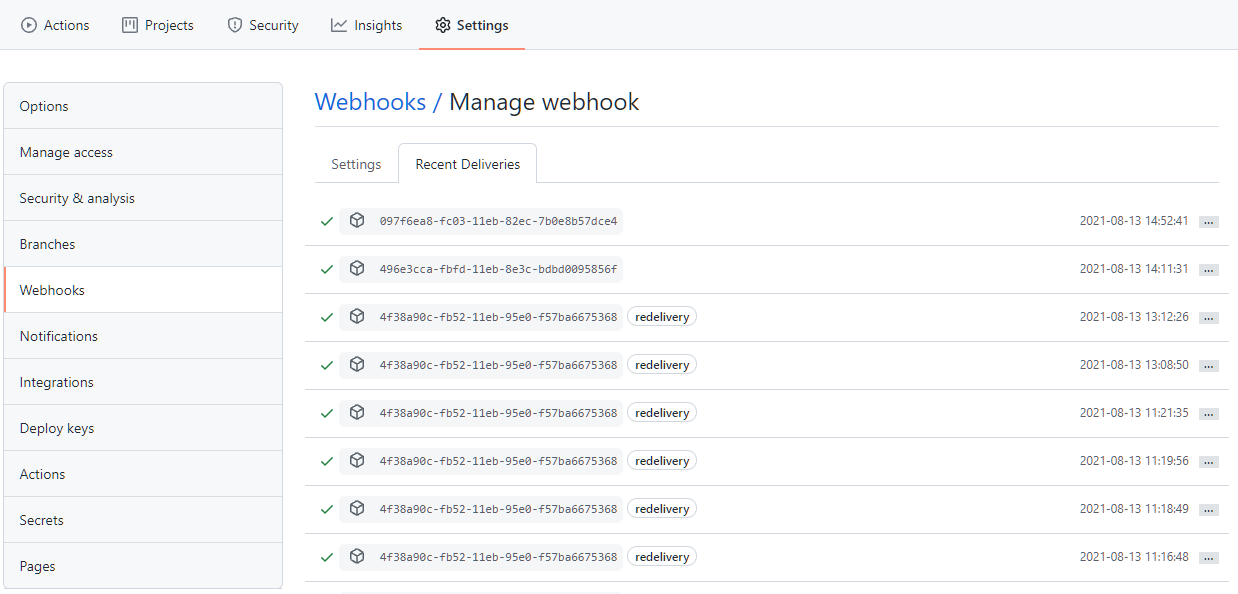
请求
GItHub提供详细的请求信息
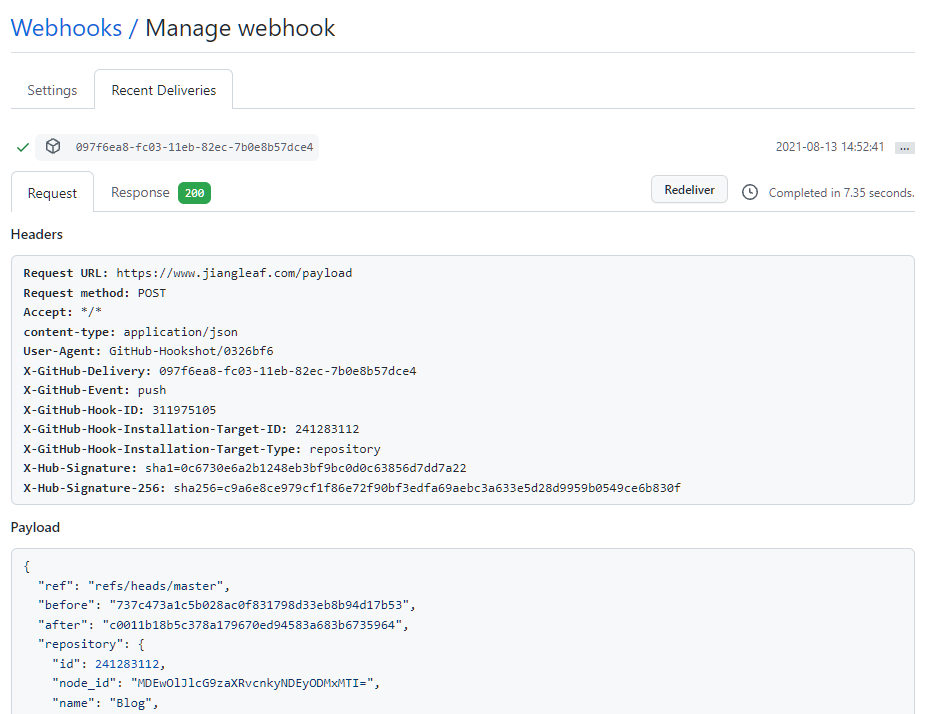
结果
Response标签页返回信息包括状态代码、标头以及响应正文中的其他数据。
安装fcgiwrap
网站服务器安装fcgiwrap
sudo apt-get install fcgiwrap
查看服务状态
systemctl status fcgiwrap.service

创建CGI脚本
创建脚本目录
sudo mkdir /home/webhook/
设置目录权限
sudo chown www-data:www-data /home/webhook/
创建脚本blog.sh
#!/bin/bash

sha=$(echo -n $REQUEST_BODY | openssl sha256 -hex -hmac "Secret Key")
sha="sha256="${sha:9}
echo "Content-type: text/plain"
echo ""

if test $HTTP_X_HUB_SIGNATURE_256 = $sha
then
        cd /home/webhook/Blog
        info=$(sudo git pull 2>&1)
        rm -rf /home/blog/_posts/*
        cp -r /home/webhook/Blog/*.assets /home/sites/blog
        cp /home/webhook/Blog/*.md /home/blog/_posts/
        cd /home/blog
        sudo JEKYLL_ENV=production jekyll build
        cp -r /home/blog/_site/* /home/sites/blog
        echo $info
else
        echo "403"
fi
说明
- $REQUEST_BODY:获取Payload URL返回正文,使用正文和密钥做哈希签名运算。
- info=$(sudo git pull 2>&1):从远程获取代码并返回结果赋值给info。
- sudo JEKYLL_ENV=production jekyll build:本网站使用jekyll,可以根据实际情况修改第12行到17行代码。
- echo $info:返回响应正文。
- echo ”403“:哈希校验错误返回403状态。
配置Nginx
location = /payload {
    if ($request_method != POST) {
    	return 403;
    }
    fastcgi_intercept_errors on;
    fastcgi_param HTTP_X_HUB_SIGNATURE_256 $http_x_hub_signature_256;
    fastcgi_param REQUEST_BODY $request_body;
    fastcgi_param DOCUMENT_ROOT     /home/webhook;
    fastcgi_param SCRIPT_NAME       /blog.sh;
    include fastcgi_params;
    fastcgi_pass unix:/var/run/fcgiwrap.socket;
}
修改www-data用户权限
nginx使用www-data用户启动服务,此用户没有登录权限,git和jekyll命令需要授权给www-data用户,可以通过修改/etc/sudoers
编码sudoers
sudo visudo
增加第13行配置
Defaults        env_reset
Defaults        mail_badpass
Defaults        secure_path="/usr/local/sbin:/usr/local/bin:/usr/sbin:/usr/bin:/sbin:/bin:/snap/bin"

# Host alias specification

# User alias specification

# Cmnd alias specification

# User privilege specification
root    ALL=(ALL:ALL) ALL
www-data ALL=NOPASSWD:SETENV: /usr/bin/git,/usr/local/bin/jekyll

# Members of the admin group may gain root privileges
%admin ALL=(ALL) ALL

# Allow members of group sudo to execute any command
%sudo   ALL=(ALL:ALL) ALL

# See sudoers(5) for more information on "#include" directives:

#includedir /etc/sudoers.d
重启服务
nginx -s reload